Category Archives: Global

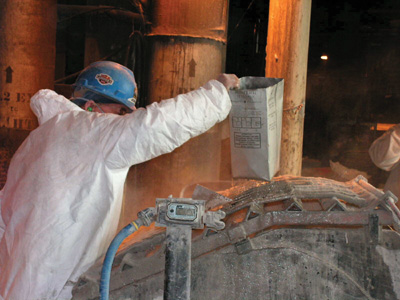
Most people think of mold as a problem on ceilings or walls. Seldom do people consider mold as it pertains to mechanical insulation. Mold growth on mechanical insulation is usually a result of insulation failure, poor design conditions, or improper piping installation techniques. In many cases, the problem results from a combination of these factors.

Mold needs water, an organic food source, and oxygen to survive. The oxygen supply is virtually everywhere in buildings. Therefore, the water source and food supply have to be controlled. This article describes various building mold problems that resulted from failures in the insulation, engineering, and piping installation techniques. It also explores how these problems can be avoided.

Situation One

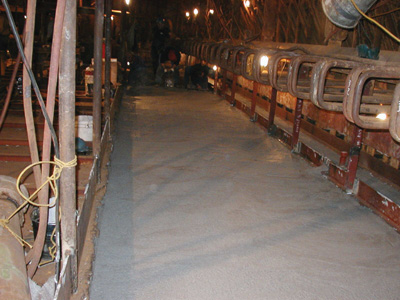
Consider the example of a standard, 35-story, high-rise condominium. The building is under construction and the first 15 or so floors are in various stages of completion. The schedule for this project is very tight. Many of the condo units are sold, and the buyers have move-in dates that must be met.

The heating and cooling for the building is a three-pipe, dual-temperature, stacked-fan, coil system. The ductwork associated with the system is lined with 1-inch-thick fiberglass for sound attenuation for the first 10 feet, and then insulated with 1½-inch-thick, 1-pound- density fiberglass blanket with foil skrim kraft (FSK) vapor barrier. The lower floors have pre-insulated pipe insulation on the risers. As the fan coils are installed, the general contractor is requesting that the tie-in insulation at each fan coil unit be installed. The roof is not on the building yet, windows are not installed on the upper floors, and rain and snow blow onto the upper floors and run down the risers into the pre-insulated material and the new tie-in materials. The lined ductwork collects the moisture from the floors above.

Water (abundant from the floors above), an organic food source (such as the paper vapor barriers and paper on the drywall materials), and oxygen are the factors needed for mold to grow. Conditions in this building make it a recipe for failure. However, it could have been avoided if the building’s owner was made aware of the problems his schedule would create for those who purchase the condo units, or if the roof and windows were installed prior to the mechanical insulation systems.

This is a difficult financial decision. Selling the units as quickly as possible is the most important factor in the financing and construction of the building. Changing the schedule and/or sealing the building from weather in segments can help mitigate water problems in high-rise buildings. Allowing insulation materials to get wet prior to the building’s completion will create a long-term problem for the building occupants and an expensive fix in the future when mold begins to show on the walls and ceilings.

Situation Two

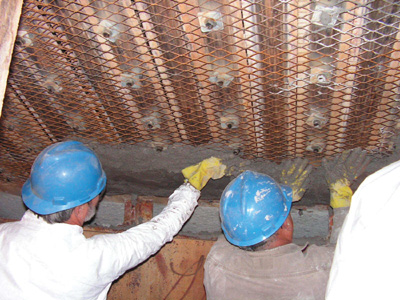
The next example is of black mold growth on the ceilings and on the walls where they meet the floors of dormitory rooms. Because of the mold growth, the dormitory must be closed until the problem is resolved. Upon inspection, it is apparent that a condensate pan drain connection is loose, and condensate from the pan is running onto the floor and wicking up the walls.

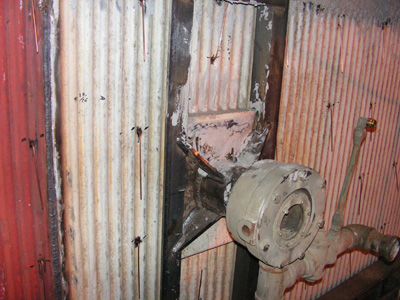
The pipes above the ceiling are another problem. Removing the ceiling tile reveals black spots on the pipe insulation. The material is standard 1-inch-thick fiberglass with all-service jacket (ASJ) on chilled water pipes. Where the connections are made to the fan coils, however, the pipes and valves are installed too close together to allow for the 1-inch-thick fiberglass with ASJ. The insulation contractor took some liberties with the system and changed the material to ½-inch-thick fiberglass with ASJ.

When the old material is replaced, the condensation problem continues. From further inspection of the building it is clear that the humidity in the public areas is very high. The design condition is not the same as the installed condition. The air-handling units feeding the common areas are not sized properly to remove the moisture from the air. Combine this problem with the disconnected pan drain pipes and the fact that the insulator was forced to install insulation materials prior to the sealing of the building envelope—which allowed water infiltration into the system—and the result is an extreme failure. It is likely that this problem could have been avoided if the air-handling units had been designed properly.

Situation Three

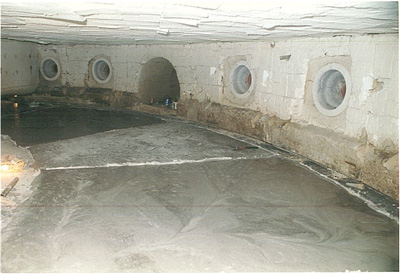
This example involves the mechanical system of a large public performance venue, where mold is growing on the pipe insulation and the fittings in various areas of the building. The specification is standard fiberglass with ASJ vapor barrier jacket. Theoretically, this specification should be adequate for the service. Upon inspection, the workmanship is excellent. All of the seams are sealed with mastic, and all of the fittings are sealed as well.

A test of the mastic samples, however, indicates that it is breathing mastic—not a vapor barrier. Vapor barriers are critical in chilled water installations. The owner of the venue had the entire system removed and replaced. The problem resulted from an improperly installed mechanical insulation system. Using the proper materials is critical on chilled water systems.

Situation Four

This example features a low-rise condominium with 4 floors and approximately 10 units per floor. The units are heated and cooled with a dual-temperature pipe system. There are no expansion joints in the system to compensate for the expansion and contraction when the cooling cycle is changed to heating. The specification is standard fiberglass with ASJ vapor barrier. Again, the specification is adequate for the system, providing the design is consistent with the actual building condition. A walk through of the building reveals discoloration on the vapor barrier, along with some indication of mold growth on wall penetrations and at some ceilings.

This building had many installation problems, as well as design flaws. Every condo unit has a 4-foot sliding door to a balcony. At any given point in a day, as many as 40 of these doors could be open to the hot, humid outside air of the summer. The common area, which is where most of the failures occur, has a makeup air system with returns that run through the various condo units. The returns pick up the outside, humid air and deposit it into the common area. The ball valves do not have extensions to allow proper insulation of the valve bodies. There are no sleeves where the pipes penetrate the walls. The condition of this building is the result of design failure, mechanical installation failure, and insulation installation failure.

Mold Makeover

Mold growing on mechanical insulation services is a problem that potentially begins with the architectural phase of the building and is exacerbated by the design engineering, the general contractor’s compressed schedule, the mechanical contractor’s poor pipe installation practices, and finally the insulation contractor trying to make it all work to accommodate all of the other parties. These conditions exemplify the importance of all parties involved in the mechanical service paying more attention to the cooling cycle for buildings. Insulation contractors should be prepared to write letters to the parties with which they have contracts to inform them that there is potential problems with the cooling cycle.

The wrong time to tend to proper mechanical insulation is after the building is finished and occupied. Schedules should allow for the proper installation of insulation materials. The design should consider the building envelope and building use, along with the equipment specified. The mechanical contractors should install the systems in such a way as to allow for proper mechanical insulation installation. Finally, the insulation contractors should keep all parties informed when they see conditions that may cause failures in the building’s future.

The evolution of closed cell elastomeric foam, first developed in the early 1900s, has had a dramatic impact on the insulation industry. The most notable reason for this is its high moisture resistance, the result of its cellular structure—millions of tiny barriers that resist the migration of liquid. This characteristic not only minimizes the threats associated with moisture (such as mold), but it also ensures steady, long-term thermal performance. Liquid has a high heat transference capability; hence, wet insulation provides very little insulation at all. Closed cell elastomeric foam has strong water vapor permeability to resist moisture absorption, so neither its performance nor its durability is impaired by the presence of moisture in a heating, ventilating, and air-conditioning (HVAC), plumbing, or refrigeration system.

History

Elastomeric foam insulation was developed in the 1950s. The introduction of this and other polymer-based materials marked an important industry transition from the use of natural materials, such as cork, to the use of synthetic materials and chemicals. The popularity of elastomeric insulation grew quickly, primarily because it eliminated the need for any type of vapor barrier to prevent the transference of moisture. As availability of the insulation in various forms (including sheets, rolls, and tubes) increased, so did its popularity as an insulator, especially in refrigeration piping and ductwork applications. It was a user-friendly alternative to other materials because it could be bonded reliably to a variety of surfaces, it was easy to install, and its performance could not be compromised by tears or punctures.

Demand for elastomeric foam has increased sharply over the last 2 decades due to heightened awareness of indoor air quality (IAQ). Since elastomeric foam does not contain formaldehyde or fibers, and has very low volatile organic compounds (VOCs), it has found wide acceptance among IAQ advocates. Because of its non-particulating, smooth surface and moisture resistance, elastomeric foam does not support the growth of mold—arguably one of the most devastating IAQ problems that facilities face.

The Manufacturing Process

The three main components used in the manufacturing of elastomeric closed cell foam insulation include the following:

  • Synthetic rubber blend, typically nitrile butadiene rubber (NBR) and/or ethylene-propylene-diene monomer (EPDM)
  • Polyvinyl chloride (PVC)
  • A chemical foaming agent

These components are combined in a large mixer, typically in batches of 500 pounds or more. The mixture is then put through extruding equipment to form a particular profile or shape, typically either a round tube or a flat sheet. The profile is heated in an oven to a specific temperature, a process that causes the chemical foaming agent to change from a solid to a gas. When this occurs, thousands of tiny air pockets (cells)—all of which are connected—form. The profile is carefully cooled to ensure that these cells remain unbroken and intact, maintaining the material’s closed cell structure. It is then cut to size and packaged for shipment. 

Elastomeric foams are made without the use of chlorofluorocarbons (CFCs), hydrochlorofluorocarbons (HCFCs), or hydrofluorocarbons (HFCs), making them suitable for the toughest environmental specifications.

Common Applications

Closed cell elastomeric foam has been successfully used as pipe insulation since it was  patented in 1954. Available in a wide range of shapes and thicknesses, elastomeric foam can be easily manipulated to fit snugly around all kinds of equipment, from residential piping to large commercial chillers. There are closed cell elastomeric foams that meet all of the code requirements, fire ratings, noise blocking, and efficiency standards for a variety of applications, including the following:

  • Refrigeration piping, hot and cold water lines, and chilled water piping
  • HVAC components
  • Interior and exterior duct systems
  • Chillers
  • Mechanical systems in industrial, pharmaceutical, and marine and offshore applications
  • Solar installations

Recent Advances

Over the years, there have been several advances in the production of elastomeric foam, making it suitable for particularly demanding applications. These advances include:

  • a non-halogen foam suitable for use on stainless steel at high-temperature applications (up to 250ºF);
  • high-temperature foams suitable for up to 300ºF;
  • availability of more colors, including white, which saves users the extra time and expense of priming or painting on indoor applications; and
  • laminated products for exterior applications where insulation would be subjected to ultraviolet (UV) exposure, weather, and physical abuse.

Perhaps one of the most exciting advances in elastomeric foam is the recent availability of insulation with a built-in antimicrobial additive.

Summary

Moisture resistance remains closed cell elastomeric foam insulation’s strongest selling point when compared to other insulating materials. This also makes it great for below ambient applications, where condensation is an issue. Solid thermal performance, user-friendly installation, durability, and appealing IAQ characteristics make it suitable for the full range of HVAC, refrigeration, and plumbing applications. The product will not absorb moisture, or trap dirt or debris that supports the growth of mold. It is a fiber-free, formaldehyde-free, low-VOC material, so it is a good candidate for those facilities that are especially concerned with IAQ.

Figure 1

  1. All properties are for the generic material type and will vary by grade and by manufacturer. All properties should be verified with individual manufacturers. Properties that are not stated may or may not be an indication that a material is not appropriate for applications depending on that property. This should be verified with the specific manufacturer.
  2. Surface burning characteristics are valid for 1-inch thickness; verify results for type and any other thickness with the manufacturer.
  3. When a property is out of the specified usage range, it is shown by N/A3. Properties that are not listed or stated are so shown.
  4. All properties listed are for the core insulation material only and may not be indicative of the performance of an insulation system, including vapor retarders, adhesives, and sealants.
  5. Many materials can be used for applications outside of the ranges listed, but additional precautions must be followed. The specific manufacturer should be consulted for detailed recommendations.
  6. Some values, such as specific thermal conductivities at various mean temperatures, may be interpolated value.
  7. This chart has been established for products with current ASTM standards.

Dr. Hira S. Ahluwalia is president of Material Selection Resources (MSR), Inc., a materials engineering and corrosion consulting organization based in New Jersey that serves the chemical, pharmaceutical, fabrication, and metal industries. Dr. Ahluwalia has extensive experience in the field of corrosion and material science, and has published numerous technical papers. His areas of expertise include CUI prevention, material selection, corrosion testing, metallurgy, and failure analysis. He has a PhD in materials and corrosion engineering from Newcastle University in the United Kingdom. A 20-year ASM and NACE member, Ahluwalia is chairman of the NACE Annual Conference Program Committee. He is also a Nickel Institute consultant and Materials Technology Institute (MTI) consultant. He can be contacted at 609-737-8226, hira@doctormetals.com, and www.doctormetals.com.

Q: Are there specific locations that are more susceptible to corrosion under insulation (CUI) for piping systems?

A: Our experience has shown that penetrations or breaches in the insulation jacketing systems–such as pipe hangers and other supports, dead legs, valves and fittings, bolt-on pipe shoes, and steam and electric tracer tubing penetrations–are more susceptible CUI locations. Low points in piping systems that are known to have a breach and places where water can easily accumulate are also susceptible to CUI. Other areas of concern include termination of insulation at flanges and other piping components; damaged or missing insulation jacketing; insulation jacketing seams located on the top of horizontal piping or improperly lapped or sealed insulation jacketing; termination of insulation in a vertical pipe; and locations where caulking has deteriorated or is missing.

Q: You mentioned in your November 2006 article that duplex alloys may be used to reduce environmental stress corrosion cracking (ESCC). What are duplex stainless alloys?

A: The duplex alloys are characterized by their austenite and ferrite microstructure that results in high strength and excellent chloride stress corrosion cracking (CSCC) resistance, localized corrosion resistance, and general corrosion resistance. The established 2205 duplex grade accounts for 80 percent of duplex usage; however, newer duplex grades have been developed for niche applications. Table 1 provides the chemical composition of the common 2205 grade and some of the “lean” duplex grades.

The “lean” duplex grades developed in recent years include LDX 2101 (Outokumpu), SAF 2304 (Sandvik), and AL 2003 (Allegheny Ludlum). These alloys have low molybdenum additions, and they are less prone to sigma phase formation during processing. LDX 2101 uses manganese rather than nickel to obtain the proper ferrite-austenite phase balance. The corrosion resistance of LDX 2101 is considered better than 304L stainless, and in most cases it is comparable to 316L. Because of the alloy’s good CSCC resistance, it is a good candidate to replace 300 series stainless steels where CSCC due to CUI is a problem.

SAF 2304 is essentially a low-molybdenum, more cost-effective version of 2205. This alloy has found applications in the pulp and paper industry where alkaline-sulfide conditions exist in pulping digesters and in other pulping liquors where molybdenum as an alloying addition reduces corrosion resistance. SAF 2304 has similar pitting and crevice corrosion resistance to 316L, but it offers far superior chloride stress corrosion resistance. AL 2003 was designed to exceed the corrosion resistance of type 316 at substantially lower cost than type 2205 duplex. The alloy has similar localized corrosion resistance to 317L, and it offers superior CSCC resistance.

Readers are encouraged to submit their own insulation questions to industry experts by e-mailing asktheexpert@insulation.org. Questions can be on any insulation topic. Future topics will include insulation maintenance, acoustics, power generation and energy issues.

History

Cellular glass insulation was developed more than 60 years ago. It is believed to have been a modification of technology that existed in Europe at the time. It was discovered that by making glass, then destroying it and baking the glass powder (with certain additions to the batch), a cellular glass “bun” could be created.

The beauty of the bun was that it was 100-percent glass with insulating and flotation properties. The glass composition made it moisture, high heat, and fire resistant. The cellular nature of the glass provided insulation and flotation. Thus, the search for new end-use applications began.

One of the first such end uses was in flotation blocks for submarine nets in U.S. harbors during the latter days of World War II. At the time, cork was in short supply and it was discovered that the cellular glass would remain buoyant and continue to hold up the nets, even after being split up by gunfire, which would originate from submarine surface guns.

At the time, cork was also used as an insulation in cold storage facilities. Because of the moisture resistance of cellular glass, it was a natural fit for cold storage or cold process service, because the vapor drive from ambient air to a cold surface creates great potential for insulation saturation. This was not a problem for cellular glass, which is resistant to such vapor drive. Thus, from the 1950s to the 1970s, the use of cellular glass in cold storage facilities became common. At this time, cellular glass insulation would also find its way into the below-ambient industrial piping and equipment markets.

As a natural outgrowth from cold storage applications, cellular glass insulation began to be used in commercial roofing. In fact, cellular glass was the first insulation to be manufactured into a “tapered” roof insulation, which enabled conversions of “flat” roofs to “low slope” roofs.

The dimensional and strength properties of cellular glass insulation led to the use of the material in load-bearing applications. Higher density grades of cellular glass insulation were developed and, as a result, today more than 90 percent of liquefied natural gas (LNG) storage tanks worldwide are built on a cellular glass insulation base.

Eventually, with more utility systems being installed underground–direct buried, in trenches, or in tunnels–ground water resistance became a major factor in insulation systems retaining their original thermal properties. It was determined that cellular glass worked well in these installations because of its resistance to water. Jackets and finishes were then developed to ensure that physical damage to the cellular glass would not take place during the backfill process.

Over the years, more end uses have emerged that require high-performance insulation systems using cellular glass. For example, systems that cycle from very low temperatures to very high temperatures create the potential for an insulation’s dimensional instability. Cellular glass is able to withstand these temperature cycles without affecting the product’s dimensional stability. 

New applications for cellular glass insulation have continued to develop. One such application niche involves a growing number of plants that have to deal with flammable liquids as a part of their processes. It has been determined that insulations may “wick” flammables like oil and other chemicals, which can provide an ignition or fuel source in the event of a fire. Because cellular glass insulation is non-combustible and nearly 100-percent closed cell, cellular glass insulation has become the standard product in these applications.

The Manufacturing Process

To manufacture cellular glass, the glass itself must be made. The material is then drawn out of a melter at very high temperatures and allowed to cool. The cooled glass is pulverized to a fine powder, and foaming agents are added. The resulting “ground batch” is measured into pans, which pass through cellulating furnaces at approximately 1,000°C, where the material begins to foam.

The resulting “buns” are removed from the cellulating furnaces and placed into annealing ovens for several hours before finally being transferred to the finishing process. There are multiple steps in the quality assurance processes to ensure that there are no defects in the blocks. After inspection are palletized and shrink-wrapped before being shipped.

Globally, the majority of cellular glass insulation is used in block form. However, for industrial insulation applications, the cellular glass insulation blocks are fabricated to produce pipe insulation, fitting covers, and other special shapes by a distributor or fabricator. ASTM C1639 serves as a guide for fabrication of cellular glass insulation.

Product characteristics of cellular glass include the following (testing certifications available from manufacturers):

  • Moisture Resistant
  • Permeability: 0 Perm in
  • Will Not Wick Flammable Liquids
  • Consistent Insulation Values (No Aging)
  • 100-Percent Glass/No Binder or Fillers  
  • Flame Spread 0/Smoke Developed 0
  • High Compressive Strength
  • Wide Temperature Service Range
  • Dimensionally Stable
  • Non-Combustible

Cellular glass insulation for mechanical insulation applications should be manufactured to comply with American Society for Testing and Materials (ASTM) C 552—Standard Specification for Cellular Glass Thermal Insulation.

Common Applications for Cellular Glass

  • Chilled Water Pipes and Equipment
  • Stainless Steel Hot Water Lines
  • Hot Oil Piping and Equipment
  • LNG Piping
  • Green Roof Insulation
  • Underground Steam Distribution
  • Cold Process Pipes and Equipment
  • LNG Tank Bases
  • Ethylene Plant Pipes and Equipment
  • Fireproof Building Panels

Manufacturers of cellular glass have traditionally participated in important NIA committees, and their technical information can be found in the following locations: the Manufacturers Technical Literature (MTL) Product Catalog at www.insulation.org/mtl, on the MTL Product Catalog CD, within the National Insulation Training Program (NITP), and in the Midwest Insulation Contractors Association (MICA) Insulation Standards CD. Websites are also a good source for up-to-date technical information about cellular glass.

Figure 1

  1. All properties are for the generic material type and will vary by grade and by manufacturer. All properties should be verified with individual manufacturers. Properties that are not stated may or may not be an indication that a material is not appropriate for applications depending on that property. This should be verified with the specific manufacturer.
  2. Surface burning characteristics are valid for 1-inch thickness; verify results for type and any other thickness with the manufacturer. (Not applicable to cellular glass.)
  3. When a property is out of the specified usage range, it is shown by N/A3. Properties that are not listed or stated are so shown.
  4. All properties listed are for the core insulation material only and may not be indicative of the performance of an insulation system, including vapor retarders, adhesives, and sealants.
  5. Many materials can be used for applications outside of the ranges listed, but additional precautions must be followed. The specific manufacturer should be consulted for detailed recommendations.
  6. Some values, such as specific thermal conductivities at various mean temperatures, may be interpolated value.
  7. This chart has been established for products with current ASTM standards.

In January 1999, 40 contractors met to form the Firestop Contractors International Association (FCIA). Four committees formed immediately to work on the development of a body of knowledge for firestopping, a technical committee, an accreditation program for firestop contractors, codes and standards, and liaison work with the outside world. Eight years later, there are real standards for firestop installation and inspection quality that are catching on in other compartmentation disciplines. The purpose of this article is to provide a brief update on the firestopping industry.

DIIM—Design, Install, Inspect, and Maintain Firestopping

The firestopping industry has been evolving quickly since its inception in the building industry in the late 1970s and early 1980s. FCIA has invested several years looking inward at itself… and firestop contractors as a tool to make better fire and life safety protection for building occupants everywhere through a quality process for firestopping. By looking inside the industry’s complete process to the work result, FCIA found a need to create standards not just for testing, but also for installation, inspection, and maintenance. Using this holistic view of firestopping and effective compartmentation brought new ideas to the construction industry through firestopping.

Design—Tested Systems Explosion

From a small 5- by 7-inch, 200-page book with firestop designs suitable for protecting a limited number of situations, to an 8- by 11-inch, 3-volume phone book, systems are available now to firestop many building types with all tested and listed systems straight from the published directories. There are 8000-plus classified firestop systems, with up to 30 variations of each one, meaning a wide array to cover a multitude of construction conditions.

Engineering Judgments

FCIA’s Firestop Manual of Practice, 2005 Edition, states that classified systems provide test-proven protection and should be used first, even if it means a change in manufacturer for that situation on a project. Since most specifications call for a “single manufacturer to the greatest extent possible,” it allows for more than one manufacturer’s products to be used… within reason… as is discussed in the maintenance section. Additionally, there are jurisdictions that do not allow engineering judgments. “Contractors and manufacturers need to know if a municipality won’t accept manufacturer engineering judgments,” says FCIA Standards Chair Randy Bosscawen of Columbus, Ohio. “Finding this out too late in the game means approval delays and possibly extra costs.”

Install—Contractor Quality Programs Take Off

To provide a proactive construction process installation protocol program, FCIA worked with Factory Mutuals (FM) Approvals to create a standard for the quality process in the construction subcontracting industry. That standard is FM 4991—Standard for the Approval of Firestop Contractors. FM 4991, listed in specifications through reference in master specifications, is a quality process audit program. To attain approval, the contractor firm must first have a designated responsible individual (DRI) who manages the firestopping installation process. The DRI passes an industry test based on the FCIA Firestop Manual of Practice (MOP), classified systems selection (Underwriters Laboratory and other directories) and the FM 4991 Standard. The DRI manages the firestop contracting firm’s processes, policies, and procedures to result in installed firestop systems that meet the tested and listed system published in the testing directories or engineering judgment and equivalent fire-resistance-rated assemblies.

During the FM 4991 Approval contractor audit, FM auditors visit the firm, audit to their quality manual, and then check the installed firestop system in the field to verify the office paperwork’s validity. Follow-up audits are done yearly by FM, with the same jobsite audit by FM personnel.

New Underwriters Laboratory Firestop Contractor Qualification Program

Underwriters Laboratory (UL) announced the new Firestop Contractor Qualification Program at the FCIA Firestop Industry Conference in November 2005. In 2006, UL held DRI testing with its own examination administered by UL. Testing takes place at FCIA conferences and at UL locations several times yearly. The UL program also has an audit of the contractor’s quality management system. The new UL program affirms that the subcontractor quality process is gathering momentum.

Both the FM 4991 and UL programs offer audit inspections of the firestop contractors’ quality processes, with field verification during an office and field audit. Specialty Firestop Contractors now have a way to separate themselves from others who have not embraced the quality process.

Why Seek Approval?

There are several reasons contractors choose to become FM 4991 Approved or UL Qualified Firestop Contractor firms. Aedan Gleeson, FCIA accreditation chair and first UL Qualified Firestop Contractor, says, “Specifiers have added FM 4991, UL Qualification, and American Society for Testing and Materials (ASTM) inspection to projects, with many of the specifications actually resulting in an FM or UL Contractor awarded the work.”

Contractor Quality Manuals

For a contractor firm to write a quality manual, it must review its processes, procedures, and people. The firm’s organization processes are reviewed from the time the estimate takes place to project award, communication to the field, then installation and inspection of the work.

“Contractor Quality Manuals are written to reflect the firms’ procedures. These are the Specialty Firestop Contractor firms’ competitive tools used to operate their companies,” notes FCIA’s Gleeson.

How the firm selects classified firestop systems, communicates them to the jobsite, and assures that firestopping is installed to the classified firestop systems and engineering judgments is their private competitive information. Each firm will have its own way of handling the quality process.

Quality Manual and Firestop Education

FCIA and UL have partnered to deliver education on the quality management system and general firestop industry knowledge important for all Firestop Specialty Contractor firms to know—a benchmark industry standard. FCIA also provides education for the FM DRI exams. For information about both the FM and UL quality programs, please visit www.fcia.org.

The ASTM E 2174—Standard for On-Site Inspection of Installed Fire Stops program was founded from the quality process approach. It is designed to be part of the total quality protocol needed for zero-tolerance firestop systems installation, including proper design, installation, and inspection.

Firestop manufacturers test their products, manufactured to strict tolerances, and publish systems suitable for use as firestops in UL and UL Canada, Omega Point Laboratories (OPL), Warnock Hersey International (WHI), and FM Approvals directories in North America. Firestop contractors select and install systems with some inspection to verify their own work quality. Inspector firms that specialize in firestopping have emerged to give third-party verification of installed systems.

It is important to understand the link between standards for quality installation, such as FM 4991 and UL Qualification, and the inspection standards. ASTM E2174—04-Standard Practice for On-Site Inspection of Installed Fire Stops covers penetrations while ASTM E2393—04-Standard Practice for On-Site Inspection of Installed Fire Resistive Joint Systems and Perimeter Fire Barriers covers the standard for inspection of joint systems for walltops, expansion and construction joints, and perimeter fire protection.

Effective quality programs have a procedure for the production process (FM and UL), while contractor sampling exists to be sure the process works. ASTM E2174 and E2393 provide the independent check and balance that samples the production process for firestop installation consistency.

FCIA firestop consultant member Patrick Tesche, of Global Environmental Services in Philadelphia, Pennsylvania, reports a huge increase in demand for services as a third-party independent inspector of firestop systems. “Even though it is not code required, it is specified, and building owners, general contractors, and design/build firms want it so that there are no surprises during the building commissioning process,” he says.

Quality Is the Whole Process

ASTM E2174 and ASTM E2393 can be used without the use of a Specialty Firestop Contractor or an FM 4991 Approved or UL Qualified Firestop Contractor on projects that use the “He or she who pokes the hole fills it” protocol.

“The inspection may cost much more when used with the multiple trade method, as it is difficult to manage anywhere from 2 to 40 subcontractor firms that touch effective compartmentation with their penetrating pipes, ducts, cables, etc.,” explains FCIA member Rob Hlady of Affinity Firestop Consulting in Winnepeg, Manitoba, Canada. “Inspection costs rise dramatically due to multiple trades involved and submittal package variances to field applications.”

Maintenance

Once installed, firestop systems may need minor maintenance over the life cycle of the building. As building services change, there are new penetrations through fire resistance rated compartmentation that needs to be repaired to keep integrity of the compartment intact. To remain reliable throughout the life cycle of the building, effective compartmentation needs to be continuously inspected and maintained. Building owners and managers have adapted the use of ‘firestop permits’ in their facilities to control changes to or newly installed firestop systems documentation. “This makes for an effective compartmentation and firestopping program,” states FCIA / NIA Member, IMICO’s Alec Rexroat, a Chicago insulation and firestop contractor.

The Firestopping Work Force

Firestopping is a very technical activity. “A successful worker needs to understand why systems are installed to zero-tolerance protocol,” says FCIA Apprenticeship Chair Bob Hasting, of Specialty Firestop Systems, Inc. “When workers understand their role in fire and life safety through following the classified firestop system to every detail, they get it… and are worthy firestop and containment workers.”

Currently, a State Apprenticeship Council exists in the state of Washington, with other states looking to get up and running. Also, the U.S. Department of Labor is looking at declaring the trade. “A 2-hour training course does not create an effective firestop and containment worker,” says Hasting. “The work force needs to understand the fire-resistance-rated assemblies, penetrating items, joints, gaps, and interaction between them to be productive and accurate at the same time. There is a lot to firestopping and effective compartmentation.”

Best of the Best

Since 1999, FCIA has been working on programs to improve the firestopping industry. Firestopping and effective compartmentation should perform as expected, when needed in fires. The complete quality approach—using a Specialty Firestop Contractor and an educated work force, with inspection by qualified inspectors to verify that the process is working and maintenance by Specialty Firestop Contractors—is the best method for providing the building owner and occupants fire and life safety during the life cycle of the building.

Architects, specifiers, engineers, building code officials, and fire marshals have agreed and shown support by specifying tested and listed firestop systems made by quality manufacturers; installed by a Specialty Firestop Contractor and/or an FM 4991 Approved or UL Qualified Firestop Contractor; and inspected to ASTM E2174 and ASTM E2393, to make the firestop total quality management process complete.

Trends in the firestopping industry will continue to be about educating those who design, install, inspect, and maintain the trade through several methods for better fire and life safety in buildings.

SIDEBAR 1

Firestopping Education

The Firestop Contractors International Association (FCIA) conducts education for all parts of the chain through books, presentations, and a website. The FCIA Firestop Manual of Practice is provided free of charge to architects, specifiers, fire marshals, and building inspectors. (Fire marshals and building inspectors are also known as Authorities Having Jurisdiction, or AHJs.) Contractors pay a fee for the document.

“FCIA’s Firestop Education Program brings designated responsible individual (DRI) candidates a prep course for the test and is used for several other key audiences, providing American Institute of Architects (AIA) continuing education credits as well,” says FCIA’s Bob Hasting. The Effective Compartmentation Symposium has been well received by specifiers at the Construction Specifications Institute (CSI) show, CONSTRUCT 2008. FCIA and Underwriters Laboratories (UL) have teamed up to create the “Total Fire Protection Systems Symposium,” which combines the Effective Compartmentation Symposium with education about sprinkler systems and detection and alarm systems to educate AHJs and architects. The education is aimed at building a greater understanding for effective compartmentation while recognizing that it is a vital part of total fire protection. Additional education from FCIA will become available for 2008.

SIDEBAR 2

Specification Suggestions

Below is some suggested specification language from the Firestop Contractors International Association (FCIA) Specification at www.fcia.org:

Contractor Qualifications Acceptable installer firms shall be:

  • FM Approved in accordance with Factory Mutuals (FM) Standard 4991—Approval of Firestop Contractors and/or a Underwriters Laboratory (UL) Qualified Firestop Contractor;
  • licensed by the state or a local authority, where applicable;
  • shown to have successfully completed not less than 5 comparable scale projects; and
  • a FCIA contractor member in good standing.

Inspection

  • An independent inspection agency, employed and paid by the owner, will examine penetration firestopping in accordance with American Society for Testing and Materials (ASTM) E2174—Standard Practice for On-Site Inspection of Installed Fire Stops and ASTM E2393. The inspection agency will examine firestopping and will determine, in general, that firestopping has been installed in compliance with requirements of tested and listed firestop systems and that the installation process conforms to FCIA Manual of Practice, FM 4991—Standard for Approval of Firestop Contractors, and UL Qualified Firestop Contractor Program.
  • The firestop inspector must pass the FM 4991 or UL Designated Responsible Individual (DRI) exam, with a score of 80 percent or greater, and maintain evidence of continued education in firestopping and effective compartmentation to qualify as an inspector. According to ASTM E2174 and ASTM E2393, the firestop inspector must not to be related to the installing contractor firm in any way, including arms-length business relationships such as subsidiaries, distributors, manufacturers’ repre-sentatives, or manufacturers’ supplying products for use in firestop systems. Note: FCIA is working with ASTM to develop a qualification of inspectors standard.
  • The inspector shall advise the contractor of any deficiencies noted within 1 working day.
  • Firestopping should not be enclosed with other construction until the inspection agency has verified that the firestop installation complies with requirements.
  • Where deficiencies are found, the firestopping should be repaired or replaced so that it complies with requirements of tested and listed system designs.

References: FCIA Firestop Industry Manual of Practice

Q: What exactly is refractory, and is it the same as concrete?

A: Cement-bonded refractory and concrete are as different as night and day. They differ in chemistry, the labor craftsmen who install them (cement masons versus bricklayers), physical characteristics of stresses and strengths, and temperature limitations. The only similarity between the two is that they both start out as a dry mix that uses hydraulic cement as its bonding agent. This means they both require water and curing to form their proper molecular structures.

Concrete material starts as a dry mix consisting of a lightweight aggregate material and hydraulic-type cement. The lightweight aggregate material is the fill that will bond with the cement to form concrete. This lightweight aggregate material is made from shale (i.e., limestone) heated in a kiln to 2,200°F. The heating process neutralizes all chemical activity within the shale. The now chemically inert material is crushed to different grain sizing. Sand also may be added as filler material, depending upon application and end-use requirements, such as stack and breeching linings. A concrete mix of aggregate and cement, when combined with water (and sometimes sand), forms what is commonly referred to as concrete.

A refractory material (cement bonded only) also starts out as a dry mix. The dry refractory mix contains the same type of hydraulic cement used in making concrete (Lumnite or Portland cement). However, unlike concrete, which uses chemically inert aggregate, refractory materials use a base aggregate material that is not chemically inert. The base aggregate material will consist of alumina, silicon carbide, or magnesium and other raw materials to meet its design requirements. A refractory material’s base aggregate will define the refractory material’s basic chemical and physical characteristics.

Typical range of chemistry of a refractory material commonly used for sealing gaps and openings on a steam-generating boiler are as follows:

38-50% Alumina (AL2O3) Base aggregate material
40-50% Silica (SiO2) Fill material
1-2% Ferric Oxide (Fe2O3) Raw material
1-3% Titanium oxide (TiO2) Raw material
8-12% Calcium oxide (CaO) Cement
<1% Magnesium oxide (MgO) Raw material
<1% Alkalies (Na2O) Raw material

Q: What is a "field-mixed" refractory material?

A: As the name implies, a "field-mixed" refractory material is mixed at the installation area and not by the manufacturer of the refractory material. The advantages are strictly economic, as field mixes are historically cheaper on a pound-per-pound basis than plant-made materials are. Field mixes are frequently used in fired heaters, ductwork, and stacks for the petrochemical industry, but are rarely used in the power industry. This may be because the amount of refractory material required for a steam-generating boiler is quite small compared to the linings required in the petrochemical industry. In addition, field-mixed refractory tends to produce variable or less consistent mix batches. Inconsistency in the mix batches can make the product difficult to install and increases the risk of refractory lining failure.

A typical field mix uses a formula or ratio of the components that make up the refractory material and is set by the manufacturer. The ratio is normally given in three parts, with each part representing a component of the mix. For example, a refractory insulating field mix material with 1:2:4 mix ratios will require one part hydraulic-type cement, two parts lightweight aggregate, and four parts base aggregate material for every cubic foot of material required. The first two parts of the ratio (1:2) are usually combined, as they are the components of cements commonly used to make refractory (Lumnite or Portland cements-see Step 3 below).

The seven steps listed below can be used to calculate field mixes. The example is based on an insulating type refractory field mix material with a field mix ratio of 1:2:4. When installed, it has a density of 56 pounds per cubic foot.

  • Step 1—Convert base cement material ratio to percent (for example, 1 part / 7 total parts = 14.3 percent)
  • Step 2—Convert cement fill ratio to percent (for example, 2 parts / 7 total parts = 28.6 percent)
  • Step 3—Combine Steps 1 and 2 for total cement percentage (14.3 + 28.6 = 42.9 percent)
  • Step 4—Calculate base aggregate percent (4 parts / 7 total parts = 57.1 percent)
  • Step 5—Calculate the amount of total refractory required (1 cubic foot (cf) x 56 pounds (lbs)/cf = 56 lbs)
  • Step 6—Calculate cement required using percent from Step 3 (56lbs x 42.9 percent = 24 lbs)
  • Step 7—Calculate base aggregate using percent from Step 4 (56 lbs x 65.91 percent = 32 lbs)

Readers are encouraged to submit their own insulation questions to industry experts by e-mailing asktheexpert@insulation.org. Questions can be on any insulation topic. Future topics will include CUI, mold, boilers, insulation maintenance, acoustics, and energy issues.

Figure 1

Concrete in residential housing

Figure 2

Concrete walls for a drop box in a steel mill

Power plants have refractory requirements for most projects or outages. Most often they are limited in nature and only require a small paddle mixer, pan, or tub to mix the material amounts needed. When a refractory boiler project exceeds the labor crafts’ expertise, or large volumes of refractory materials are required, the refractory work is usually subcontracted. Outside sourcing would be required, for example, if the refractory material is to be pneumatically applied, shot-creted, or pumped. Good subcontracting practices must be enforced from the design level to the finished product, beginning with a best-practice approach and including clear contract documents.

Similar to the insulation and lagging specifications, a well-written refractory specification must do the following:

  • It must convey to the installing contractor or personnel, clearly and without exception, the intent of the specification.
  • It must provide the information necessary for the installation to proceed.
  • It must list only the elements contractually required for proper installation and supply of the refractory as defined by the scope (quantitative take-offs and drawings provided)—that is, it does not state what is not required.
  • It must establish proven standard methods of construction.

Sample Specification

The following is an example of a refractory specification needed to ensure that all pertinent issues commonly associated with refractory installation are addressed:

Part I—Typical General Refractory Information (gri):

1gri
The Refractory Contractor shall perform all phases of work and supply all materials required in an acceptable manner as shown on the drawings and documents submitted with these specifications. The quantitative takeoff provided with these specifications is intended as a guide solely for the purpose of defining the scope of work. It will be the Contractor’s responsibility to verify material types and quantities.

2gri
Materials furnished by the Contractor shall be unloaded, stored, and weather protected by the Contractor until applied.

3gri
The Contractor shall furnish all supervision, labor, tools, and equipment–including, but not limited to, compressed air, scaffolding, dry storage, office, and change room facilities necessary to install all materials furnished under these specifications.

4gri
Potable water, tap water (non-potable), and electricity for construction purposes will be made available to the Contractor by the Company. The Contractor is to supply extension cords, lamps, water hoses, and any other equipment needed to complete the work.

5gri
The Contractor shall furnish all material and labor necessary to fabricate, install, and remove any forms that may be necessary to properly apply or install the materials.

6gri
No materials that are used or furnished by the Contractor in connection with this scope of work–including, but not limited to, all insulation materials, cements, gaskets, packing, roping, etc., shall contain any amount of asbestos. All materials being furnished under this contract must be asbestos-free. The Company shall reject any and all asbestos-containing materials.

7gri
The Contractor is responsible for the correct installation of the installed refractory.

8gri
Installing Contractor (or manufacturer) is responsible for providing a proper material dry-out procedure for the refractory material installed. Refractory materials must be thoroughly dried to reach their proper strength. Refer to contract requirements of dry-out responsibilities and schedule.

9gri
Installing Contractor may be responsible for providing the dry-out services for the refractory material installed. Check contract scope requirements for more information pertaining to dry-out responsibilities.

10gri
Final approval or acceptance of the installation by a Company inspector or representative does not relieve the Installing Contractor of any responsibility, warranty, or guarantees for a proper installation.

11gri
The Company’s premises must be kept reasonably clean during construction and left broom clean prior to Contractor’s leaving the job at completion.

12gri
Installing Contractor, after award, shall submit a bill of materials listing the quantities and sizes of the materials required to complete the refractory requirements. This bill of materials should include the material manufacturer’s name and extra quantities included for wastage. The quantitative takeoff provided with this specification does not relieve Contractor of the responsibility to verify quantities or types of materials being provided.

13gri
No chrome or non-chrome-containing refractory shall be replaced with a chrome-containing product. Hexavalent chromium is a carcinogen and can cause numerous health hazards. Inhaling dust from a hexavalent chromium material increases the risk of lung cancer.

14gri
No coal tar-based products can be used as parting agents.

15gri
Installing Contractor is responsible for curing installed refractory material. Cement-bonded refractory materials must be cured for a minimum of 24 hours by the Installing Contractor.

Note:
The term “curing” means keeping the installed refractory material wet or the surrounding atmosphere humid to create the most favorable conditions for the completion of the chemical reactions of the cement. Curing results in improved strength and allows the refractory material the potential for reaching its proper strength after dry-out is performed. This will permit proper strength development before starting air drying or application of heat (dry out).

16gri
Installing Contractor is required to properly vent the surface of installed phosphate-bonded refractory materials (if applicable). Vent holes should be placed on 6- to 9-inch centers. The surface of the plastic material should be covered, kept from drying out, and protected from freezing.

17gri
Phosphate-bonded refractory materials must be cured and dried at the same time. A phosphate-bonded material must be cured and dried within the first 2 to 3 weeks after installation.

18gri
Installing Contractor is responsible for ensuring that the right amount and type of water is used in mixing the refractory material.

19gri
Installing Contractor is responsible for ensuring that the proper mix time is followed, based on the refractory manufacturer recommendations and site conditions.

20gri
Installing Contractor is not permitted to remix or re-use previously mixed or installed refractory.

21gri
Installing Contractor is required to wear protective equipment (masks, gloves, protective clothing) when mixing, installing, or removing refractory material.

Part II—Typical General Application Information (gai):

1gai
The quantitative takeoff provided with these specifications is intended as a guide solely for the purpose of defining the scope of work. It will be the Contractor’s responsibility to verify material types and quantities.

2gai
This specification will provide general installation instructions for
gun (dry or wet), ram, or conventional (cast, pour, or trowel) applications.

3gai
Refractory must be stored in dry, well-ventilated conditions. The
temperature of the stored material must be kept between 50°F and 90°F.

4gai
Refractory material that is covered with a plastic sheeting or tarp
must be ventilated with air holes to prevent condensation forming on the inside of the tarp or plastic sheeting.

5gai
No refractory material should be used if the manufacture date of the refractory is longer than 12 months for general seal application. For refractory intended to be used in high-temperature and/or corrosive areas (cyclone burners and furnaces, ash hoppers, or seals inside the boiler or furnace), the manufacture date of the refractory material should be less than 3 months.

6gai
Prior to installing the refractory, all surfaces must be dry, clean, and oil free. Any grease or loose mill scale must be removed prior to applying refractory. If sandblasting is required to remove rust, loose mill scale, or other foreign materials, sandblast shall be a brush-off blast cleaning only in accordance with SSP-SP-7-63. After sandblasting, the surface should be cleaned with an air jet. It must not be washed with water, as this may cause rusting of the surface.

7gai
The final refractory mix temperature must be between 50°F and 90°F, or it cannot be used.

8gai
The following formula may be used for estimating the temperature of fresh-mixed refractory:

X = [(W * T) + .22 (Wc * Ts)] / (W+.22Wc)

Where W = weight of water (a quart of water weighs 2.08 pounds)
Wc = weight of dry castable
T = temperature of water (degrees F)
Ts = temperature of solids (degrees F)
X = Temperature of mixed castable (degrees F)

9gai
Different refractory materials should not be mixed together.

10gai
Mixers should be thoroughly washed before and during the course of the day, during the course of the work shift, to prevent build-up of refractory materials inside the mixer.

11gai
potable water should be used when mixing refractory.

Note:
Other types of water may contain industrial compounds, salts, or minerals that can easily contaminate a refractory mix and seriously impact its performance.

12gai
Refractory materials, in most applications, must be prewetted before mixing. Check with refractory material manufacturer for recommended prewetting instructions.

13gai
Refractory material may not be used if the time duration from mixing to installation exceeds manufacturer’s recommended “pot” life span.

Note:
Pot life span is set by the manufacturer and refers to the amount of time from when a refractory material is mixed to when it is applied. This can vary from as short as 15 minutes to as long as 45 minutes, depending upon the material.

14gai
Refractory material must be properly cured for a minimum of 24 hours and protected from freezing.

15gai
Phosphate-bonded refractory may require venting and be dried within 3 weeks of installation.

16gai
Installing Contractor shall mix only as much material as can be used with the time period of the pot life of the refractory material.

17gai
Forms, when required, must be watertight and suitably braced, and should be left in place until the refractory material has hydraulically set. The forms should be painted or coated with an approved parting agent. Either metal or wood can be used as a form material.

18gai
Installing Contractor is responsible for any expansion requirements, and these should be incorporated into the refractory seal during the installation. A 1/8-inch minimum expansion should be place every 10 feet to assure proper expansion of the seal.

19gai
Installing Contactor shall thoroughly work into place all refractory material and shall remove, by rodding or vibrating, any internal air bubbles.

Note:
This can be done using an electric rodder or drill on the outside of the forms.

20gai
Smoothing or finish troweling of the refractory surface must be avoided. The surface of the refractory should not appear smooth (like concrete) and can be finished with a curry comb, if desired.

21gai
The equipment and set-up for gun application should be determined by the installer and should be based on the size of the installation and the gunning material to be installed. It is recommended that the Installing Contractor check with the gunning machine manufacturer to ensure compatibility of the rotor being employed with the refractory material being gunned. All operation and maintenance of the equipment should be done in accordance with the manufacturers’ specific instructions.

22gai
Plant air can be used, but the air volume and pressure must remain constant and uninterrupted.

23gai
When work is stopped at any time before completion, all plastic refractory (if applicable) must be covered with a moist paper or sacking material. For installations that require 5 days or more, the wall should be covered with a polyethylene film or plastic material. If there is an overnight interruption on the ramming, the top 2 inches of the wall area should be cut off and thrown away prior to installing new plastic refractory material.

The Bottom Line

A well-written specification (and bid package) protects both the subcontractor and end user by preventing installation problems or misunderstandings. Subcontract packages based on the best practice approach to subcontracting, including a well-written specification, have the best chance for a proper, longer-lasting refractory installation.

Figure 1

Pheumatic gunning convection pass roof on a radiant power boiler

Figure 2

Typical machine for shotcrete application

Figure 3

Prevent old & expired refractory material from being used

Each year, lack of continuing education, missed opportunities to record historical data, and lost expertise at power plants and original equipment manufacturers (OEM) result in an overall loss in knowledge and experience with refractory work. Another concern for the industry is the common practice of using non-typical labor craft for mixing and installing refractory. This article provides information both on how to record necessary steps for mixing and installing refractory, and on how to help educate the crafts that are installing refractory at power plants.

Who Does What?

Power plant work—such as welding plate and pressure parts, erecting steel, electrical work, material handling, fly ash removal, and installing refractory—is typically assigned to people who have been trained to perform that work. Most work done at a power plant has some type of published standards, procedures, or best practices that are accepted and applied throughout the industry to help ensure that the work is done correctly. (For example, the American Society for Testing and Materials, National Board of Boiler and Pressure Vessel Inspectors, and the American Society of Mechanical Engineers all provide standards for this type of work.) Unfortunately, when it comes to refractory, there are no accepted industry standards or monitoring board or association that says how it is supposed to be done or who is supposed to be installing it. This may be the reason that many power plants use or allow non-bricklayer-type labor to mix and install refractory.

Such overlapping of work responsibilities, where one craft claims another’s work, can trigger a jurisdictional dispute between competing unions. In turn, the jurisdictional disputes can help define what craft is responsible for installing what material, or for which types of work. The International Union of Bricklayers and Allied Craftworkers, and the International Association of Heat and Frost Insulators and Asbestos Workers Agreement, for example, explains the conditions under which bricklayers can claim the installation of insulation over the outside of boiler walls.

Standard Procedures and Practices

Refractory is too important a component on a steam-generating boiler to worry about labor jurisdiction or responsibilities, which suggests that there is a need to establish some practical and agreeable procedures for installing refractory. Proper refractory installation can only be achieved when good refractory practices are followed (regardless of who or which craft is doing the work). The following guidelines may be a good starting point for ensuring the proper installation of refractory:

General Mixing and Installing Information for Troweling, Casting, or Pouring

These general mixing and installation instructions apply when installing refractory by troweling, casting, or pouring. The cast or pour method is defined as installing refractory when filling seal or wall boxes, or when installing a large amount of refractory, with the use of forms to retain and hold the refractory. The trowel method is defined as installing thin refractory linings by hand, or when the location is not readily accessible for other applications. The consistency of the refractory mix will vary not only by the characteristics of the refractory material, but also by the application requirements. The following steps should be taken as minimum requirements for properly installing refractory when using these types of applications:

  1. Read the refractory material data sheet before using any refractory material.
  2. Read the information on the back of refractory bag, taking note of the following:
    • Percentage or range of water recommended (range usually applies to application needs)
    • How long to mix the refractory material
    • Date the refractory material was made
    • Pot life of the refractory
  3. For proper mixing, remember the following points:
    • The amount of water required for mixing will vary by the characteristics of the refractory material and application requirements.
    • Add just enough water to meet the application requirements (such as being sticky and capable of staying in place for troweling, or in a fluid state for pouring and casting-see ball-in-hand, Item 5, below).
    • The water source for mixing refractory should be potable (drinkable) or treated water–never river water.
    • The final mix temperature should be between 50°F and 90°F.
    • A wetter mix may handle more easily, but it robs the refractory material of its needed strength.
    • A mix that is too dry is difficult to place and may set to a weak, porous, “popcorn” structure.
    • A proper refractory mix usually will seem on the thick side, as compared to mixing conventional concrete.
    • All tubes or penetrations located inside a refractory seal area should be coated or sealed with a parting agent (such as white latex barn paint) prior to installing refractory.
  4. Calculate and fill the required water amounts into clean containers (pails) prior to mixing the refractory. The water amount initially will be based on the refractory manufacturer’s recommendations, found on the back of the bag, and the size of the mixing device being used (a two-bag paddle mixer). Also remember the following:
    • Always use clean containers, and periodically rinse them.
    • Never pour water directly into the refractory from a water hose.
    • Adjust the water amounts during the first two mix batches for mix consistency and workability at install, then add holes in the container just at the water lines of each container. This will ensure that the water amounts will be the same from one mix batch to another.
    • Use a device (a wrist watch with a second hand, or a stop watch) to accurately record the length of time the refractory is mixed.
  5. Use the ball-in-hand method to test the consistency of the refractory before using and installing a refractory mix. Make a small ball of refractory mix (2 to 3 inches in diameter) and toss it 12 inches into the air, taking note of the condition of the ball as it hits the flat palm of the hand that catches it. Follow these rules of thumb:
    • If the ball breaks, it is too dry for all applications.
    • If the ball flattens out, it is too wet for troweling but acceptable for pouring and casting.
    • If the ball retains its size and approximate shape, it is acceptable for troweling.
    • The ball-in-hand method should be done after every batch.
  6. Place the mixed refractory into clean pails and transport to the work location, making sure to put equal amounts into each pail for ease of installation and for monitoring material quantities and labor productivity.
  7. Do not over-trowel the finished surface of the refractory. Over-troweling will bring the cement to the surface and will seal the refractory surface, restricting the escape of water vapor (which occurs during dryout).
  8. Vibrate all cast or pour applications to remove all air bubbles trapped inside the refractory.
  9. Properly prepare the surface of the refractory after installation is complete by taking the following steps:
    • Hand brush or curry comb the surface of all exposed refractory to keep the surface open to promote proper dryout.
    • Keep the surface of the refractory moist, or the surrounding atmosphere humid, for a minimum of 24 hours to cure the refractory. This can be accomplished using a fine mist of water (but not soaking), covering the refractory with wet canvas bags, or spraying the surface with a manufactured curing compound.
    • Protect freshly installed refractory from freezing (if applicable) for a minimum of 48 hours using external heat.

    Most refractory projects are small in size and do not require much heavy equipment. The most commonly used and preferred method of mixing is either using a paddle mixer or using a pan or tub for mixing by hand. The following are general instructions for their use:

    General Instruction for Using a Paddle Mixer (Two-Bag Paddle Mixer)

    1. Turn mixer on before adding water or refractory.
    2. Add half the water amount required into the mixer before adding refractory.
    3. Add up to the two-bag limit of the desired refractory material.
    4. Add the balance of the required water slowly to achieve proper consistency for the application desired, checking consistency throughout the process.
    5. Paddle mix refractory for 3 minutes after all the water and refractory have been added to the mixer. Over-mixing tends to speed up the setting rate. Never remix.
    6. Test for proper consistency using the ball-in-hand method before removing refractory from the mixer.
    7. Clean mixer every two to three batches to prevent clogging and paddle jamming.

    General Instruction for Hand Mixing Using a Pan or Tub

    1. Add half the water amount required into the pan or tub before adding refractory.
    2. Add up to two bags only of the desired refractory material.
    3. Add the balance of the required water slowly to achieve proper consistency for the application desired.
    4. Hand-mix refractory thoroughly for 4 minutes after all the water and refractory have been added to the pan or tub. Over-mixing tends to speed up the setting rate. Never remix previously mixed or partially mixed refractory.
    5. Test for proper consistency using the ball-in-hand method before removing refractory from pan or tub.
    6. Clean the pan or tub after every mix to remove old material. Never re-use old material.

    Save Energy and Cost

    Compared to most components found in a steam-generating boiler, the cost of the materials and installation of refractory is very small (less than 1 percent of the total cost of construction). If improperly mixed or installed, however–regardless of who is doing the mixing or installing–it will have an adverse effect on the amount of energy usage for that boiler. Even though refractory is one of the smallest components on a steam-generating boiler, it pays to mind refractory mixing and installation procedures.

    Figure 1

    Typical power plant

    Figure 2

    Laborers removing fly ash (notice the color of the hard hat)

    Figure 3

    Laborers doing material handling (notice the color of the hard hat)

    Figure 4

    Laborers mixing refractory (notice the color of the hard hat)

    Figure 5

    Laborers installing refractory—trowel application (notice the color of the hard hat)

    Figure 6

    Laborers installing refractory—pour application (notice the color of the hard hat)

    Figure 7

    Correct type of paddle mixer

    Figure 8

    Wrong cement mixer being used at site

    Figure 9

    Refractory mixing tub

Given today’s challenges, the steam-generating industry needs the most cost-effective refractory and brick installations. This requires knowing material and labor differences, understanding common labor applications, and accounting for the expansion issues unique to power plants. Following the best practices approach to subcontracting can achieve increased profitability and decreased risk.

Steam-generating facilities limit their boiler outages to twice a year (spring and fall), with each boiler at a facility designated for a major maintenance outage or shutdown every 2 years (or less frequently). A steam-generating facility typically will have more than one type of boiler (for example, Combustion Engineering, D.B.Riley, Babcock & Wilcox, and Foster Wheeler) and as many as eight (or more) boilers in operation. Excluding boilers with cyclone burners, which require regular refractory replacement, most boiler maintenance outages require little or no refractory work.

Large refractory projects at a steam-generating facility occur only when the plant is replacing a wet bottom type ash hopper, furnace water walls, or roof and super heater tubes. These types of projects may occur every 5 to 7 years, or more, because they are categorized as capital improvements and not maintenance.

Given these conditions, there are limited opportunities for refractory contractors to work at a steam-generating facility or on a particular boiler, so any work experience a refractory contractor develops at a particular plant or on a type of boiler must come over a long period of time. This may be why most refractory installing contractors spend more than 80 percent of the year working outside of the power-generating industry (in foundries, glass and steel industries, etc.).

As those who install refractory or lay brick know, working in a steam-generating boiler is not like working inside a rotary hearth furnace, chlorinator, holding furnace, cupula, calciner, sulfur box, incinerator, tunnel kiln, dipwell hearth, tipup furnace, smelter, top or bottom ladles, or lime kiln. The refractory requirements, expansion issues, and material selections in a steam-generating boiler are unique and can vary from steam-generating facility to facility, and from boiler to boiler.

Most refractory installation companies are small, locally owned or operated businesses (with an owner or office manager, one estimator, one or two office staff support, and one or two labor foremen or superintendents on the full-time payroll), which can hinder their ability to estimate large refractory projects completed over a short period of time. For example, a capital improvement project involving the complete replacement of all refractory materials on a 1960 vintage radiant power boiler would take a person 40 to 80 hours (2 full weeks) of work to calculate actual material quantities (takeoffs); establish labor man hours, productivity, and crew sizing; and complete all material and labor cost estimates. Given the competitive nature of the refractory installation business, it would be impractical for a refractory installer to spend that much time, manpower, and effort just to bid a project.

Refractory is a key component of every steam-generating boiler, but the lack of hands-on boiler experience, the limited number of large capital improvement projects, and the nature of the refractory industry create a problem for the power industry. If power plants, original equipment manufacturers (OEM), and construction companies want better bid pricing from their refractory installers, it would be helpful for them to include more information in their bid packages (more than a few drawings and a specification).

The author’s following best practice approach for subcontracting refractory projects offers four rules to help achieve better profitability and reduce risk:

Best Practice Rule #1

Understand risk when subcontracting refractory during the proposal phase of a project.

This best practice approach assumes that the company’s profitability and the amount of risk associated with a project are directly proportional to how well one estimates the cost of the project during the proposal phase.1

During the proposal phase, the refractory cost estimates (refractory material and labor) can only be done by using historical data and estimating the cost in house, or by soliciting bids from outside sourcing. Unfortunately, the amount of information available (drawings, engineering, technical information, boiler operation design information, etc.) to estimate a project during the proposal phase may be limited at best.

For example, when an OEM company is bidding on the supply of a new steam-generating boiler to a power company, usually only one or two proposal-type drawings are generated, showing the barest of information (overall boiler outline and the scope of supply). Just enough engineering is done to satisfy the customer’s bid package requirements (providing proposed boiler performance information), and proposed refractory requirements typically are not addressed.

Compare this to the amount of information available for refractory after the project has been awarded to the OEM company. It is then that all engineering and boiler operations and conditions are established, with 100 to 300 drawing (including details), and all refractory requirements (locations and material types) established by specification and/or drawings.

Soliciting bids on refractory with incomplete bid packages, especially during the proposal phase of a project, clearly increases a company’s risk.

Best Practice Rule #2

Never go for refractory subcontract bids without a complete bid package.

This best practice approach requires that subcontractors receive a complete bid package, including all contractual documents, a quantitative takeoff for establishing work scope (see Rule #3), and the preferred schedule to be worked (for example, 40 single, 50 double). This ensures that all bids will be based on the same scope and schedule (an apples-to-apples comparison). In addition, a complete bid package must include all drawings, details, and specifications associated with the refractory work areas. Ironically, most companies prefer not to include detail drawings (for example, door and wall box details, seal box details, burner throat details, tube arrangement details showing spacing and sizing) in their bid packages because they consider this information confidential or proprietary. However, those installing refractory (or brick) generally have no interest in using this information beyond the given project or plant. Leaving out such drawings only increases the potential for cost adders and missed scope.

Some companies also are afraid to include quantitative takeoffs in their bid packages because they fear this will place all of the risk of the project on them and not the refractory installer. The exact opposite is true. A complete bid package that includes quantitative takeoffs (and all pertinent drawings, including detail-type drawings) will reduce the risk of missed or incomplete work scope from the subcontractor and will help meet expected bid dates, as described above (see Rule #3 for additional benefits). Using incomplete bid packages for subcontracting and outsourcing does not work because it is based on several false assumptions, including the following:

  • Bidders will include items that they do not see in the bid package because they are in the business to know what is actually required to complete the project.
  • Bidders will include items that they do not see in the bid package because they know what the solicitor really wants or needs.
  • Bidders will quote a firm, fixed dollar amount that will be all-inclusive, whether the bid pack-age is complete or not.

Best Practice Rule #3

Know the refractory requirements and costs before subcontracting.

Companies must know their refractory scope and costs prior to going out for subcontract bids. Unfortunately, it is common within the power industry for companies to believe that they can achieve their established budgets or allowances just by going out for bids without knowing or completely understanding the scope of refractory work and costs. In fact, the exact opposite is true. Not understanding the scope of the work and costs does the following:

  • It increases the risk of omissions and additions in the work scope.
  • It increases the risk of potential health and safety issues or litigation. (For example, a refractory installation today specifying a chrome-based product can create a potential risk tomorrow when the refractory material is to be removed. When chrome-based products are heated during boiler operation, they can change to a hexavalent material that must be treated as a health risk).
  • It hinders the bid evaluation process because the bids may not be based on the same parameters (not an apples-to-apples comparison), depending on how various bidders interpreted the work scope. Having a contract estimate to compare against the subcontract bids will speed up the bid evaluation process and help establish expected fair and reasonable subcontract costs. Anyone experienced in the bid evaluation process knows how difficult this can be, especially when only one or two bidders respond.
  • It increases the risk that not all of the bids will be received in time to meet bid and construction dates (remember how small a typical refractory company is).

The primary purpose of establishing refractory contract estimates and calculating quantitative takeoffs is to build refractory historical databases and improve field installations by increasing site manageability. This information also can improve subcontracting practices. The last place refractory problems should arise is at the plant site during installation. The only way to reduce the risk of potential site problems, increase the chances of receiving a fair and reasonable bid, and meet budgeted allowances is by knowing the refractory requirements and costs before going out for subcontracting bids.

Best Practice Rule #4

Take a cradle-to-grave approach to projects.

This best practice approach to refractory subcontracting requires a cradle-to-grave approach. Only by following a project through to completion can a company truly understand the accuracy or deficiencies established in its estimates–particularly the impact that the decisions and approach of the proposal phase had on profitability and risk. The benefits for a cradle-to-grave approach include the following:

  • It ensures that all decisions and approaches taken during the contract phase reflect what was in the proposal phase (reducing risk).
  • It helps estimators increase their accuracy, competitiveness, and efficiency (increasing profitability).
  • It provides information that can be added to the historical database, helping to prevent future project errors or omissions (and increasing profitability).
  • It increases the experience level within the company (especially when dealing with refractory).2

Final Note

Increasing profitability and reducing risk requires a best practices approach to refractory subcontracting. In the end, following best practices will yield a healthier power-generating industry. Companies cannot afford to use an inflated refractory subcontract number to establish their budgets and allowances, nor can they hope to stay under budget unless they subcontract the best practice way.

(1) “Proposal phase” refers to the early or “proposed” stage of an upcoming outage project (sometimes a year or more in advance). This phase is typically done prior to completion (or even start) of any engineering work done for the purpose of establishing a realistic and workable budget/allowance/bid (estimate).

(2) This cradle-to-grave approach is essential when dealing with refractory (and brick) because the power industry has lost expertise at all levels (power plants, OEMs, construction companies). Only by rebuilding this expertise can the industry hope to improve refractory installations. The cradle-to-grave approach is one way to develop this expertise.

Figure 1

CFB Boiler

Figure 2

Combustion engineering boiler name plate

Figure 3

Typical small refractory project—sootblower wall box

Figure 4
Figure 5

Wet bottom ash hopper before new refractory installation

Figure 6

Roof tube project with refractory over roof tubes

Figure 7

Existing chrome based refractory at junction floor & vertical water wall

Figure 8

Typical non-power plant project – rotary hearth furnace

Through the Save Energy Now (SEN) initiative, the Department of Energy’s (DOE’s) Industrial Technologies Program (ITP) helps industrial plants save both energy and money by conducting energy assessments using DOE software tools and technical information to determine how to reduce energy use in key industrial processes.

The energy assessments conducted by the DOE’s energy experts help manufacturing facilities of all sizes and in locations across the United States identify immediate opportunities to save energy and increase profitability. These assessments focus primarily on energy-intensive systems, including process heating, steam, pumps, fans, and compressed air. Insulation systems have proven to be one of the top 10 steam and process heating assessment opportunities that can result in huge dollar savings per year for participating facilities (see Figures 1 and 2). Plus, 76 percent of steam assessment and 73 percent of process heating assessment recommendations had estimated paybacks of less than 2 years (see Figures 3 and 4).

Here are some key results from the 2006 SEN assessments:

  • Identified natural gas savings: 53 trillion British thermal units (Btus) per year
  • Natural gas savings per year: Equivalent to the annual natural gas consumed by 725,000 typical homes
  • Identified cost savings potential: $500 million per year
  • Total potential carbon dioxide (CO2) emissions reduction: 4 million tons per year

The majority of the 2006 assessments were performed in the Eastern and Southern United States. (See Figure 5 for a detailed map.) SEN assessments were completed in 18 major U.S. industry sectors, with 163 of the assessments in six industry sectors (see Figure 6).

In 2006, 114 steam assessments were done in 37 states. Total recommended steam savings for 2006 were $364 million per year. Analysis of steam systems included the following:

  • Boiler and combustion systems
    • Combustion analyzers
  • Boiler blowdown
  • Individual end-use equipment
  • Turbines
  • Condensate systems and deaerators

In 2006, 86 process heating assessments were done in 30 states. Total recommended process heating savings for 2006 were $136 million per year. Analysis of process heating systems included the following:

  • Melting furnaces
    • Metal and non-metal
    • Aluminum or non-aluminum
    • Glass or non-metal
    • Metal heat-treating
  • Drying ovens
  • Thermal oxidizers

Results That Speak for Themselves

According to results from a follow-up effort to analyze the 2006 SEN assessment program, the initiative has been quite successful. The following information was obtained during follow-up interviews with 179 plants 6 months after the assessments were completed:

  • Energy savings projects worth $30 million per year were immediately implemented.
  • Energy savings projects worth $98 million per year are in the process of being implemented.
  • Energy savings projects worth $179 million per year are either being planned or are under review.

Of the plants that participated in follow-up interviews, 90 percent said the energy savings assessments influenced the decision to implement energy efficiency projects. The 12-month follow-up reports, with 128 plants participating, provided an even more vivid picture of the 2006 SEN program. These results included the following:

  • Total savings of $81 million per year were obtained from implemented energy-saving projects.
  • An additional savings of $70 million per year were expected from energy-saving projects that are under way.
  • Projects that are scheduled to occur are expected to result in an additional $180 million per year in energy savings.

Hands-on training and active participation are both key factors in the SEN program’s approach. For 2006, the following results show that this “training assessment” approach pays off for facilities participating in the Energy Savings Assessments:

  • From 3-day assessments, the average recommended savings have been about 10 percent of plant energy use.
  • The majority of identified savings opportunities have paybacks of less than 2 years.
  • The 6- and 12-month follow-up implementation results have been encouraging.
  • Large industries and states continue to be enthusiastic about the SEN program and its efforts to help facilities save both energy and money.

To view the full report from the 2006 SEN assessments, please go online and visit www.eere.energy.gov/industry/saveenergynow/partners/results.cfm.

For additional information about the SEN program, please visit www.eere.energy.gov/industry/saveenergynow.

Figure 1
Figure 2
Figure 3
Figure 4
Figure 5
Figure 6